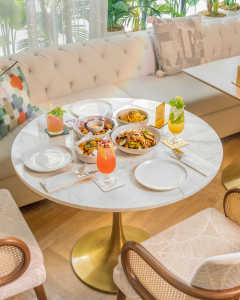
Lighting plays a big part in making food look fresh and appetising in photos. Natural light is a simple and effective way to highlight colors and textures. The right setup, timing, and positioning help create well-balanced images. Learning how to use daylight properly improves the final result of professional food photography.
Find the best light source:
Placing food near a window helps achieve soft and even lighting. Large windows facing north or south provide consistent light without harsh shadows. If direct sunlight is too strong, sheer curtains or white diffusers soften the effect. Moving the setup closer or further from the window changes the brightness and contrast.
Choose the right time of day:
Different times of the day produce different lighting effects. Early morning and late afternoon have softer light, while midday sun is brighter and harsher. Cloudy days provide even lighting without strong shadows. Experimenting with various times helps in finding the best look for each dish.
Use reflectors to balance shadows:
Shadows add depth but should not overpower the subject. White foam boards, paper, or reflectors bounce light back onto the food, reducing dark areas. A silver reflector improves brightness, while a gold reflector adds warmth. Adjusting their position improves the overall lighting balance.
Avoid direct sunlight for softer images:
Direct sunlight can create strong highlights and deep shadows. If the light is too intense, moving the setup to a shaded area or using a diffuser helps create a softer effect. Placing a thin white sheet or paper over the window spreads the light evenly.
Adjust angles for the best effect:
Different angles change how light interacts with the food. Side lighting highlights textures and details, making it suitable for dishes with depth. Backlighting improves steam and liquids, while front lighting reduces shadows. Small changes in position can improve the final image.
Keep the background simple:
Natural light works well with neutral backgrounds. Light-colored surfaces like marble, wood, or white paper reflect light, while darker surfaces absorb it. Choosing the right background ensures the food remains the main focus without distractions.
Using daylight correctly improves food photography by creating natural and balanced images. Adjusting the light source, time of day, and shadows helps improve textures and colors. Simple techniques like using reflectors and diffusers make a difference in the final outcome. These steps are helpful when working with a professional food photographer.